I bought some more ESPHome RGB bulbs from AliExpress (hey, the US is unpredictable right now in terms of tariffs so I’m avoiding purchasing from them until this “trade war” has gone away). They came in as XCRHom.tech RGB bulbs (great name, definitely not a typo) and they have a less than useful website for well, anything https://xcrhom.tech/
There’s no details on what the actual config should be, the pinouts or anything like that.
First Programming attempt
I found these bulbs didn’t like connecting to my usual “IOT” network, which I suspect was due to the preinstalled firmware and the fact I use the same SSID for 2.4 and 5GHz (maybe I should change that at some point), so I used my IOS(hit) network which is just 2.4GHz. And that worked fine. From there I could hit them with a config file.
Since they seemed very similar to my existing Athom bulbs, I used that config file, but it didn’t work that great
On/Off ✅
Setting to White ❌ The bulb went Blue
Setting to Red ❌ The bulb went White
Setting to Blue❌ The bulb went Green
Setting to Green ❌ The bulb went Red
So this was less then awesome, but pretty easy to reorder the inputs
Space issues
The next issue I encountered was lack of space on reflashing, this was because it couldn’t store the new firmware to update to when it was running the previously programmed firmware. This wasn’t an issue with the first flash as the “staged” basic firmware takes up very little space.
Since the athom bulbs came with a preprogrammed NTP config, which I didn’t really need, I just deleted that from the configuration file and it bought the size down enough to program without any issues
Configuration files
As with my previous configurations, I use a combination of files.
xcrhom-rgb-1.yaml
(repeat this file for each bulb just changing the file name and number)
substitutions:
  number: "1"
  friendly_name: "XCRhome RGBCW Bulb ${number}"
  # Allows ESP device to be automatically linked to an 'Area' in Home Assistant. Typically used for areas such as 'Lounge Room', 'Kitchen' etc
  room: ""
  # Description as appears in ESPHome & top of webserver page
  device_description: "xcrhom 7w rgbcw light bulb"
  # Restore the light (GPO switch) upon reboot to state:
  light_restore_mode: RESTORE_DEFAULT_ON
  # Enables faster network connections, with last connected SSID being connected to and no full scan for SSID being undertaken
  wifi_fast_connect: "false"
  # Enable or disable the use of IPv6 networking on the device
  ipv6_enable: "false"
  color_interlock: "true"

<<: !include common/xcrhom-rgbct.yaml
xcrhom-rgb.yaml
# Put these in the parent file
# substitutions:
#   number:
#   friendly_name: "XCRHom RGBCW Bulb ${number}"
#   # Allows ESP device to be automatically linked to an 'Area' in Home Assistant. Typically used for areas such as 'Lounge Room', 'Kitchen' etc
#   room: ""
#   # Description as appears in ESPHome & top of webserver page
#   device_description: "XCR 7w rgbcw light bulb"
#   # Restore the light (GPO switch) upon reboot to state:
#   light_restore_mode: RESTORE_DEFAULT_ON
#   # Define a domain for this device to use. i.e. iot.home.lan (so device will appear as athom-smart-plug-v2.iot.home.lan in DNS/DHCP logs)
#   dns_domain: ".local"
#   # Enables faster network connections, with last connected SSID being connected to and no full scan for SSID being undertaken
#   wifi_fast_connect: "false"
#   # Enable or disable the use of IPv6 networking on the device
#   ipv6_enable: "false"
#   color_interlock: "true"

packages:
  restore_light_state: !include restore_light_state.yaml
  common: !include common.yaml

esphome:
  name: "xcrhome-rgbcw-bulb-${number}"
  # Default friendly name
  friendly_name: "${friendly_name}"
  comment: "${device_description}"
  area: "${room}"
  name_add_mac_suffix: false
  min_version: 2024.6.0

esp8266:
  board: esp8285
  restore_from_flash: true

preferences:
  flash_write_interval: 1min

binary_sensor:
  - platform: status
    name: "Status"
    entity_category: diagnostic

sensor:
  - platform: uptime
    name: "Uptime Sensor"
    id: uptime_sensor
    entity_category: diagnostic
    internal: true

  - platform: wifi_signal
    name: "WiFi Signal dB"
    id: wifi_signal_db
    update_interval: 60s
    entity_category: "diagnostic"

button:
  - platform: restart
    name: "Restart"
    entity_category: config

  - platform: safe_mode
    name: "Safe Mode"
    internal: false
    entity_category: config

output:
  - platform: esp8266_pwm
    id: white_output
    pin: GPIO4
    min_power: 0.000499
    max_power: 1
  - platform: esp8266_pwm
    id: red_output
    pin: GPIO12
    min_power: 0.000499
    max_power: 1
  - platform: esp8266_pwm
    id: green_output
    pin: GPIO14
    min_power: 0.000499
    max_power: 1
  - platform: esp8266_pwm
    id: warm_white_output
    pin: GPIO13
    min_power: 0.000499
    max_power: 0.9
  - platform: esp8266_pwm
    id: blue_output
    pin: GPIO5
    min_power: 0.000499
    max_power: 0.9

light:
  - platform: rgbww
    id: rgbww_light
    name: "RGBCW_Bulb"
    restore_mode: ${light_restore_mode}
    red: red_output
    green: green_output
    blue: blue_output
    warm_white: warm_white_output
    cold_white: white_output
    cold_white_color_temperature: 6000 K
    warm_white_color_temperature: 3000 K
    color_interlock: ${color_interlock}

text_sensor:
  - platform: wifi_info
    ip_address:
      name: "IP Address"
      entity_category: diagnostic
    ssid:
      name: "Connected SSID"
      entity_category: diagnostic
    mac_address:
      name: "Mac Address"
      entity_category: diagnostic

  #  Creates a sensor showing when the device was last restarted
  - platform: template
    name: "Last Restart"
    id: device_last_restart
    icon: mdi:clock
    entity_category: diagnostic
common.yaml
substitutions:
  wifi_fast_connect: "false"

# Common configuration to setup defaults
logger:

web_server:

captive_portal:

mdns:

api:

ota:
  platform: esphome

wifi:
  ssid: !secret wifi_ssid
  password: !secret wifi_password
  ap:
  power_save_mode: none
  # Allow rapid re-connection to previously connect WiFi SSID, skipping scan of all SSID
  fast_connect: "${wifi_fast_connect}"
It's time to de-duplicate and tidy up some of my ESPHome Configs
This doc is broken down into a few sections, the explanation for why, the shared configurations, and finally my device type configurations, this last one has usage docs.
Update 17th April 2025: restore_switch_state.yaml no longer uses method call/perform, I think this was always broken, but it was compiled and installed fine until ESPHome 2025.4.0
I want to make it easier to maintain and apply changes and keep configurations consistent, with my previous blog posts I had things working but they were inconsistent (because I pulled configs from t’internet)
The issues I had were
Not all devices restored state, some of my bulbs did, none of my switches did, when power was restored
I had inconsistent IDs based on where configuration files came from (rgbww_light vs light_rgbww)
I wanted more consistency across the formatting
If I decided to add a configuration option in the future, I didn’t want to add it to 20+ devices by hand
Research
I found an initial “simple” solution from the ESPHome documentation, the YAML insertion operator
The issues with this is it literally just adds the content to the current definition, so you can’t have duplicate sections
If your main yaml has
substitutions:
  some_var: value

<<: !include common.yaml
And the common.yaml has
substitutions:
  other_var: other value
You’ll get errors, this wasn’t great for my reduce, reuse, recycle plan.
So then I found out about packages, this is exactly what I wanted since you merge the files this way.
The format here is very similar, but also a bit odd (I wanted to know more about the naming and if I could reference things, but no luck)
Then my files are well configured (below to save repitition) to reduce the duplication
Shared configurations
These aren’t really device specific but are building blocks for the devices
common.yaml
This file defines my ESPHome configs that are common across all my devices
substitutions:
  wifi_fast_connect: "false"

# Common configuration to setup defaults
logger:

web_server:

captive_portal:

mdns:

api:

ota:
  platform: esphome

wifi:
  ssid: !secret wifi_ssid
  password: !secret wifi_password
  ap:
  # Allow rapid re-connection to previously connect WiFi SSID, skipping scan of all SSID
  fast_connect: "${wifi_fast_connect}"
restore_light_state.yaml
This restores the light state based on the individual device configuration, my original configs had light_rgbww or rgbww_light as the light id, which I didn’t like!
# Provides directive to allow the light state to be restored from the previous mode

esphome:
  on_boot:
    then:
      - script.execute: fast_boot_script
      - select.set_index:
          id: power_mode
          index: !lambda |-
            return id(restore_mode)-1;
      - lambda: |-
          switch(id(restore_mode))
          {
          case 1:{
                  auto call = id(rgbww_light).turn_off();
                  call.perform();
                  break;
                  }
          case 2:{
                  auto call = id(rgbww_light).turn_on();
                  call.set_color_mode(ColorMode::WHITE);
                  call.set_brightness(1.0);
                  call.perform();
                  break;
                  }
          default:{
                  break;
                  }
          }

button:
  - platform: factory_reset
    name: "Factory Reset"
    id: Reset
    entity_category: config
globals:
  - id: fast_boot
    type: int
    restore_value: yes
    initial_value: "0"

  - id: restore_mode
    type: int
    restore_value: yes
    initial_value: "1"

select:
  - platform: template
    name: "Power On State"
    id: "power_mode"
    optimistic: true
    options:
      - Always Off
      - Always On
      - Restore Power Off State
    on_value:
      then:
        - lambda: |-
            id(restore_mode)=i+1;
script:
  - id: fast_boot_script
    then:
      - if:
          condition:
            lambda: return ( id(fast_boot) >= 3 );
          then:
            - lambda: |-
                ESP_LOGD("${friendly_name}", "Now the counter is greater than or equal to 3, perform reset device and reboot");
                id(fast_boot) = 0;
                fast_boot->loop();
                global_preferences->sync();
                auto call = id(rgbww_light).turn_on();
                call.set_transition_length(500);
                call.set_brightness(1.0);
                call.set_color_mode(ColorMode::RGB);
                call.set_rgb(0.0, 0.0, 1.0);
                call.perform();
            - delay: 5s
            - button.press: Reset
      - lambda: |-
          id(fast_boot) += 1;
          fast_boot->loop();
          global_preferences->sync();
          ESP_LOGD("${friendly_name}", "Now the counter is %d.  Reset the device when the counter is greater than or equal to 3", id(fast_boot));
      - delay: 10s
      - lambda: |-
          ESP_LOGD("${friendly_name}", "Reset counter");
          id(fast_boot) = 0;
          fast_boot->loop();
          global_preferences->sync();
restore_switch_state.yaml
Similar to restore light state, but for outlets! I could probably deduplicate some more, but this is fine for me for now
Updated 2025/04/17
# Provides directive to allow the switch state to be restored from the previous mode

esphome:
  on_boot:
    then:
      - script.execute: fast_boot_script
      - select.set_index:
          id: power_mode
          index: !lambda |-
            return id(restore_mode)-1;
      - lambda: |-
          switch(id(restore_mode))
          {
          case 1:{
                  id(outlet).turn_off();
                  break;
                  }
          case 2:{
                  id(outlet).turn_on();
                  break;
                  }
          default:{
                  break;
                  }
          }

globals:
  - id: fast_boot
    type: int
    restore_value: yes
    initial_value: "0"

  - id: restore_mode
    type: int
    restore_value: yes
    initial_value: "1"

button:
  - platform: factory_reset
    name: "Factory Reset"
    id: Reset
    entity_category: config

select:
  - platform: template
    name: "Power On State"
    id: "power_mode"
    optimistic: true
    options:
      - Always Off
      - Always On
      - Restore Power Off State
    on_value:
      then:
        - lambda: |-
            id(restore_mode)=i+1;
script:
  - id: fast_boot_script
    then:
      - if:
          condition:
            lambda: return ( id(fast_boot) >= 3 );
          then:
            - lambda: |-
                ESP_LOGD("${friendly_name}", "Now the counter is greater than or equal to 3, perform reset device and reboot");
                id(fast_boot) = 0;
                fast_boot->loop();
                global_preferences->sync();
                id(outlet).turn_on();
            - delay: 5s
            - button.press: Reset
      - lambda: |-
          id(fast_boot) += 1;
          fast_boot->loop();
          global_preferences->sync();
          ESP_LOGD("${friendly_name}", "Now the counter is %d.  Reset the device when the counter is greater than or equal to 3", id(fast_boot));
      - delay: 10s
      - lambda: |-
          ESP_LOGD("${device_name}", "Reset counter");
          id(fast_boot) = 0;
          fast_boot->loop();
          global_preferences->sync();
Devices
These are the device specific files, I add a quick and easy section to copy-and-paste to new devices if I need to re-use or share them with others
globe-50323.yaml
This is my core definition for the Globe 50232 pot lights
Building on yesterdays blog post, today I was tidying up my basement and realized I had 10 Recessed RGB CT lights (Globe Lighting 50323) that used Tuya and the BK7231 chipset and I could use Tuya Cloudcutter again!
I am not an electrian, this is not professional advice, seek the advice of a professional before doing this!
These devices are in two parts:
The 120VAC regulator -> I’m not 100% certain what the output is here, but the actual light itself connects to a 2 pin, polarised, and threaded connection
The light -> This has the chip in a box on the cable that connects to the light itself.
And the regulator as I’m calling it, even uses push connectors so no need to worry about marettes getting disconnected.
I connected a fused plug to a length of solid core Romex (grounded!), connected it to the push connectors in the box, and then plugged that into one of my previously flashed smart plugs so I could easily toggle the power.
Because the light itself has the chip in it, if you’re doing a bunch of these in a row, I found it easiest to
Turn off the outlet (you don’t want any live power when swapping out the light, it may spark if you do and this feels sketchy dangerous to me)
Disconnect the two pole light
Plug the new light in
To reset the device for AP mode, I just used the button on the smart plug, I could probably have written an automation to do this in Home Assistant, and if I was doing more than 10, I may have.
These used the usual 3x powercycle for EZ Flash mode, then 3x powercycle for API mode.
Cut the Cloud!
This time, I decided to “optimize” my flashing process.
Create all my configurations in ESPHome Builder
Build all the Tuya Cloudcutter .ug.bin files
Immediately flash each device with the fully configured ESPHome firmware
Step One: Configs
So a quick google for ESPHome 50323 didn’t return me any preconfigured configurations, however, the awesome team at LibreTiny have a tool that can create the ESPHome config for you
Use a substitutions block to set numbers on these (I realize there’s some duplications, but I don’t mind too much)
Remove the password from API (I’ve never needed this, I think ESPHome will inject it automatically for me)
Remove the password field from ota, I’m not sure why this is needed, but my other devices don’t have it. And if I want to reintroduce it, I just need to update my devices from ESPHome builder which is nice and fast.
So here’s my globe-50323-1.yaml, as with the previous blog post, I just needed to duplicate this file 9 times since I have ten lights! Updating the number line for each one.
I did check this manually on one device first to make sure it fully worked before building the remaining 9
Step Two: Build the files
This time, from ESPhome Builder, when I selected install manually, I chose to download the Cloudcutter Image
This I downloaded to the tuya-cloudcutter/custom-firmwares folder (fun fact I discovered, anything in this directory becomes an optional target when going through the manual process to select a firmware)
Step 3: Flash the devices
As with the previous builds, the first time through I manually selected the device profile from the Command line interface, this gave me the following configuration output:
And I just needed to run this manually for each device and increment the -1- for each device. Nice and simple.
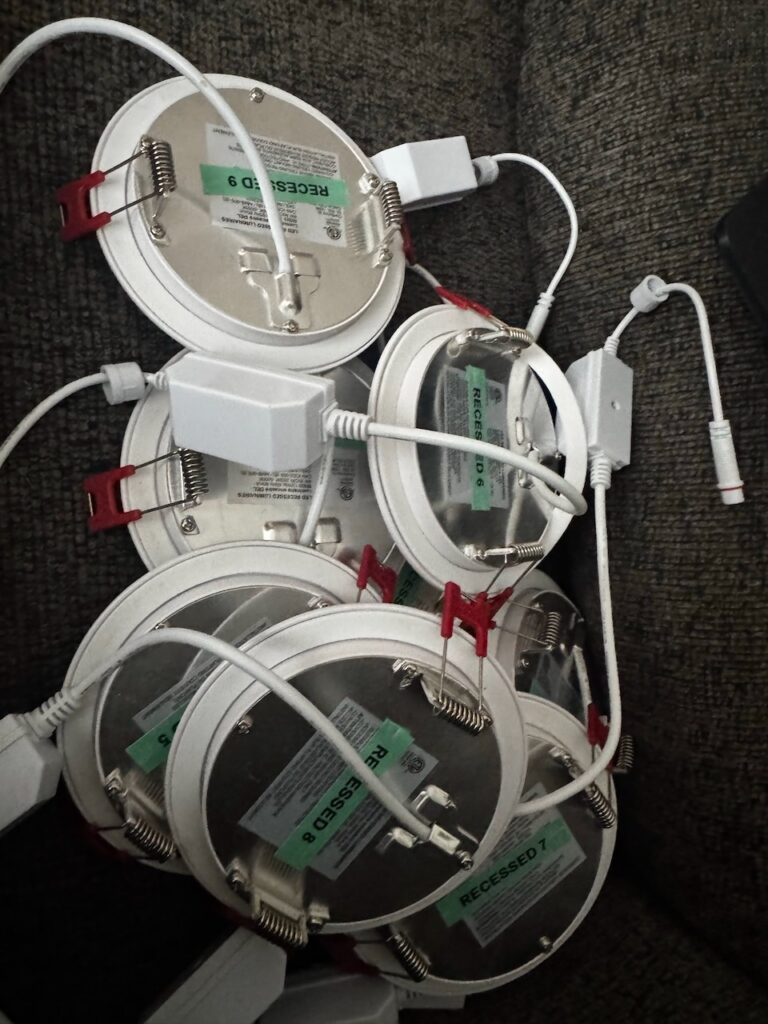
And done
Here’s my victory photo of a pile of flashed and labelled lights!
A friend who saw this photo is currently in a debate with me about whether the green label printer tape makes me good or evil. Maybe I should have used red….
As part of my exploration into more local control, I went on a journey with some smart devices that, at a high level, look the same, but in reality have some differences!
I’ve been running Home Assistant for years, I’ve had a lot of great success with a weird mismatch of devices (WiFi, ZWave, Zigbee) and cloud platform providers (Tuya, SmartHome, SmartThings, Google, Amazon, etc…)
Since moving to a new house in October 2024, I decied to take a strong local control approach, this means that I needed to look at all my devices and work out how to:
Remove dependencies on external clouds (Sorry Sofabaton, your horrendous insecure external API is a no-go)
Examine ways to do local audio control (no more Alexa/Google Home)
Improve the local interface (tablet interface)
This blog post is covering one of the big external cloud dependencies I (and many others have): Tuya
Tuya is a massive white-label company, there’s hundreds of products that can be easily resold with custom applications (rebranded Tuya) and under a custom brand (I’ve seen Globe, and Dals Connect personally)
There’s projects like Local Tuya that have been succesfull in bridging the cloud-local gap a small amount, the idea is that you can communicate with the devices over the local IP addresses instead of going through Tuyas API. I’d been using this for a while without any issues. But recently (the last 3-4 months) it’s become more unstable, with devices getting “lost” by LocalTuya (Local Tuya won’t see them), until I open the Tuya official app and toggle the states manually. This is really painful for times when I’m on vacation, and I don’t want to have to set up alerts that say “Hey, your devices are desynced and you need to go and poke X devices to make them work again”, this isn’t a slight on the LocalTuya project, they’ve done really good work here.
There’s also solutions like Tuya Convert and Tuya Cloudcutter, there’s a reason there’s two different projects here
Target Framework
There’s some choices that you’ll get here, you can choose to flash a local Tuya Cloud (not localTuya, but MockTuyaCloud I think, I never went down this route), OpenBeken, or ESPHome
I personally went with ESPHome because I have a lot of other devices that use ESPHome, and I like the ESPHome Builder add on for Home Assistant OS. I don’t need to manage my own containers for ESPHome, and I can do all my editing, flashing, and log viewing from the Home Assistant Web UI, which is great for me when I’m remote and troubleshooting things.
Chips
A lot of these smart devices were originally based around the ESP8266 style chips, these were (and still are) cheap System On Chip (SOC) with WiFi and could easily be adapted for many uses. As with all capitalism, companies will look for alternatives over time, both from a price standpoint, and to keep people locked into their ecosystem. The ESP8266 chips were easy to reprogram, they’re designed that way, so you reduce vendor lockin unintentionally.
Cue, the BK72xx chips, these were less well known and harder to just attach cables to program custom firmware and release consumers from the Tuya ecosystem.
Finally, at least from what I’ve seen, Tuya have been shipping their own custom chips, the WRD8P. To my knowledge, these do not have any current way to jailbreak/flash custom firmware on.
To flash the others, there’s choices (and some not-so-much-choices)
Flashing Chips
If you get lucky, you can use Tuya Convert or Tuya Cloud Cutter with Over The Air (OTA) flashing to wirelessly reprogram these devices. Sometimes the chips come with exploitable firmware out of the box, sometimes you need to update the software so they can be exploited, sometimes you can’t exploit them this way.
When the chips have un-exploitable firmware, you can potentially fall back to the option of attaching wires and manually programming them (one of my friends has blogged about his experience here).
But, I’m lazy, and it’s really hard to attach wires to the controller chip in a light bulb, they’re tight, and fiddly, and I don’t want to do it. So I went with the OTA method for both my light bulbs and my smart plugs!
Smart Plugs
Similar to Roos adventure, I have a bunch of Globe Smart Plugs from Costco, and they have the Beken chipsets. So I know I can’t use tuya-convert, I have to use tuya-cloudcutter
I downloaded the tuya-cloudcutter repository to my Debian based laptop (it’s uses Pop_os! 24.04, so alpha software) to use as my host attack machine!
HERE BE DRAGONS! Don’t do anything you aren’t comfortable with. There’s a non-zero chance this won’t work, may leave your laptop in a weird state, may brick (make unusable) your target device!
git clone https://github.com/tuya-cloudcutter/tuya-cloudcutter
cd tuya-cloudcutter
From here, you need to confirm a couple of things
You have everything you need to get started, you’re going to lose the internet until the flash process is complete (unless you have a second network interface, such as a second wifi client, or a wired connection)
You’re 100% certain that you know you want to continue.
As you get more comfortable with this, you may want to setup your target “final” firmware that you want to use. See the section below for these steps
When you’re ready, the simplest approach is to just launch the script and run through the steps manually. It walks you through things in an interactive way
sudo ./tuya-cloudcutter.sh
The first phase is setting up the device profile and the target firmware, for these plugs there’s two ways to select the profile, personally I opt to select by Manufacter/Device Name but I’ve also done it by firmware version, I just find the former easier to do (and slightly less scrolling). There’s no type-ahead filtering here, so just scrolling down to Globe Electric and then selecting 50329 Smart Plug, for me, I only had one firmware to choose from. If you have multiple options here, you will need to try each one in turn, or connect it to the Tuya app so see what firmware is loaded.
1) Detach from the cloud and run Tuya firmware locally
2) Flash 3rd Party Firmware
[?] Select your desired operation [1/2]: 2
Loading options, please wait...
[?] How do you want to choose the device?: By manufacturer/device name
 ► By manufacturer/device name
   By firmware version and name
   From device-profiles (i.e. custom profile)

[?] Select the brand of your device: Globe Electric
   Feit
   Filohome
   Firefly
   Fitop
   FLSNT
   Geeni
 ► Globe Electric
   Globo Lighting
   Gosund
   Hama
   Helloify
   HeuxGir
   Hihome

[?] Select the article number of your device: 35804 RGB E26 LED Bulb
   35798 A19 RGBCT Bulb v1.3.21
   35804 RGB E26 LED Bulb
   35851 E26 RGB Bulb
   37783 RGBCT Bulb v2.0.0
   37783 RGBCT Bulb v2.0.3
   50151 Smart 2-Outlet Outdoor Plug
   50239 Motion Night Light
   50323 RGBCT Recessed Light
 ► 50329 Smart Plug
   50347 Smart-Plug

[?] Select the firmware version and name: 1.1.8 - BK7231T / oem_bk7231s_rnd_switch
 ► 1.1.8 - BK7231T / oem_bk7231s_rnd_switch
Then there’s some safety checks, I personally have always let it terminate systemd-resolve and apparmor for the duration of these flashes. I’m not sure if it’s needed, but it felt right.
Final setup step, you’ll be asked to select the firmware, as I said, I use ESPHome, so I went with that.
[?] Select your custom firmware file for BK7231T chip: ESPHome-Kickstart-v23.08.29_bk7231t_app.ota.ug.bin
 ► ESPHome-Kickstart-v23.08.29_bk7231t_app.ota.ug.bin
   OpenBeken-v1.18.31_bk7231t.ug.bin
You’ll now get a presentation of what was selected, if you end up doing this flash multiple times, you’ll want to note/copy down this information as you’ll use it again to save time!
Now the flashing process starts! The script will tell you what to do.
For the plugs, I held down the power button for a few seconds until it clicked, and this put the plug into pairing mode (which is a fast blink on the button LED), then repeated this and it entered AP Mode (which is a slow blink, or “breathing” on the button LED)
================================================================================
Place your device in AP (slow blink) mode.  This can usually be accomplished by either:
Power cycling off/on - 3 times and wait for the device to fast-blink, then repeat 3 more times.  Some devices need 4 or 5 times on each side of the pause
Long press the power/reset button on the device until it starts fast-blinking, then releasing, and then holding the power/reset button again until the device starts slow-blinking.
See https://support.tuya.com/en/help/_detail/K9hut3w10nby8 for more information.
================================================================================

Scanning for open Tuya SmartLife AP
......................
Found access point name: "Globe Suite-18AD", trying to connect...
Error: Connection activation failed: The Wi-Fi network could not be found.
................................
Found access point name: "Globe Suite-18AD", trying to connect...
Device 'wlp0s20f3' successfully activated with '055d86b5-b09c-423e-a0ac-d6dbba32c770'.
.
Found access point name: "Globe Suite-18AD", trying to connect...
Device 'wlp0s20f3' successfully activated with '055d86b5-b09c-423e-a0ac-d6dbba32c770'.
Connected to access point.
Waiting 1 sec to allow device to set itself up...
Running initial exploit toolchain...
Exploit run, saved device config too!
output=/work/configured-devices/tQ6NtVtsxRQ7.deviceconfig
Saved device config in /work/configured-devices/tQ6NtVtsxRQ7.deviceconfig
You can see it struggled to connect the first couple of times, then it succeeded and worked! The exploit is in play.
Make sure you fully powercycle (unplug, wait a few seconds, and plug it back in) before continuing.
Sometimes the device will go back into AP mode straight away after this, so wait a few seconds to make sure it doesn’t get picked up automatically.
You will probably need to repeat the AP process (long hold x2) to get the device flashed
================================================================================
Power cycle and place your device in AP (slow blink) mode again.  This can usually be accomplished by either:
Power cycling off/on - 3 times and wait for the device to fast-blink, then repeat 3 more times.  Some devices need 4 or 5 times on each side of the pause
Long press the power/reset button on the device until it starts fast-blinking, then releasing, and then holding the power/reset button again until the device starts slow-blinking.
See https://support.tuya.com/en/help/_detail/K9hut3w10nby8 for more information.
================================================================================

Scanning for open Tuya SmartLife AP
............
Found access point name: "A-18AD", trying to connect...
Device 'wlp0s20f3' successfully activated with '12631878-8862-40d8-adb8-50411acc2427'.
.
Found access point name: "A-18AD", trying to connect...
Device 'wlp0s20f3' successfully activated with '12631878-8862-40d8-adb8-50411acc2427'.
Connected to access point.
Configured device to connect to 'cloudcutterflash'
Device is connecting to 'cloudcutterflash' access point. Passphrase for the AP is 'abcdabcd' (without ')
Flashing custom firmware...================================================================================
Wait for up to 10-120 seconds for the device to connect to 'cloudcutterflash'. This script will then show the firmware upgrade requests sent by the device.
================================================================================

Using WLAN adapter: wlp0s20f3
Configuration file: /dev/stdin
Using interface wlp0s20f3 with hwaddr 40:ec:99:f3:3a:a4 and ssid "cloudcutterflash"
wlp0s20f3: interface state UNINITIALIZED->ENABLED
wlp0s20f3: AP-ENABLED
If your device gets stuck here with no progress after several (at least two) minutes, see https://github.com/tuya-cloudcutter/tuya-cloudcutter/wiki/FAQ#my-device-gets-stuck-after-dhcp-what-can-i-do for additional steps
Using PSK v1 - Received PSK ID version 01
Processing endpoint /v1/url_config
Processing endpoint tuya.device.active
Processing endpoint tuya.device.dynamic.config.get
Processing endpoint tuya.device.upgrade.get
Processing endpoint tuya.device.upgrade.status.update
Processing endpoint /files/ESPHome-Kickstart-v23.08.29_bk7231t_app.ota.ug.bin
Processing endpoint tuya.device.uuid.pskkey.get
Firmware update progress: 19%
Firmware update progress: 30%
Firmware update progress: 60%
[Firmware Upload] /files/ESPHome-Kickstart-v23.08.29_bk7231t_app.ota.ug.bin send complete, request range: bytes=0-438751/438752
Firmware update progress: 90%
Firmware update progress: 98%
Firmware file has been sent and MQTT reported a progress of nearly complete.  Waiting 15 seconds to ensure flashing completes.
Flashing should be complete.  It takes about 15 seconds for the device to reboot and verify the flash was valid.
Please wait about 30 seconds then look for signs of activity from the firmware you supplied (either watch for AP mode or check if it joined your network).
Device MAC address: cc:8c:bf:4e:18:ad
While this is a bit messy, it’s clear (to me) what it’s doing and what the expectations are. When it’s done the device will reboot into the custom firmware framework. And sit broadcasting it’s own kickstart access point
Don’t connect to this quite yet, I found it easiest to get my ESPHome Firmware ready first
Bulbs
I also have a few Globe Lighting RGB Bulbs from Costco, these ones are also BK7231T chipsets so I can flash these as well
This was almost exactly the same process as above, but selecting a different device
[?] How do you want to choose the device?: By manufacturer/device name
 ► By manufacturer/device name
   By firmware version and name
   From device-profiles (i.e. custom profile)

[?] Select the brand of your device: Globe Electric
   Feit
   Filohome
   Firefly
   Fitop
   FLSNT
   Geeni
 ► Globe Electric
   Globo Lighting
   Gosund
   Hama
   Helloify
   HeuxGir
   Hihome

[?] Select the article number of your device: 35804 RGB E26 LED Bulb
   35798 A19 RGBCT Bulb v1.3.21
 ► 35804 RGB E26 LED Bulb
   35851 E26 RGB Bulb
   37783 RGBCT Bulb v2.0.0
   37783 RGBCT Bulb v2.0.3
   50151 Smart 2-Outlet Outdoor Plug
   50239 Motion Night Light
   50323 RGBCT Recessed Light
   50329 Smart Plug
   50347 Smart-Plug

[?] Select the firmware version and name: 2.9.16 - BK7231T / oem_bk7231s_light_ty
 ► 2.9.16 - BK7231T / oem_bk7231s_light_ty
For the bulbs, putting them into access point mode was a bit more tedious, you have to turn them off and on again 3 times to get them into pairing mode, and then 3 times again to get them into access point mode. For this, I used a desk lamp with the appropriate fitting.
You can’t toggle them too quickly though, there’s a capacitor in there that takes a short time to discharge, so I turn it off, wait a second, then turn it back on, then repeat.
You’ll get the same fast to slow flash cycle, but because these are light bulbs, it’s a lot brighter, so watch your eyes.
ESPHome Firmware
My firmware is setup in a way that I can easily copy and paste the setup and just change one field to make it work.
I have a couple of secrets in my ESPHome configuration wifi_ssid and wifi_password so I don’t need to expose my secrets when sharing the configuration file
There’s a couple of ways you can add this configuration file
Create a new device in the ESPHome Builder UI, setup the basics, and then just copy and paste the content below in
Using the Home Assistant Terminal (I use the Addon for this), and editing the file directly in ~/config/esphome (i.e. vim ~/config/esphome/globe-plug-1.yaml)
I use this approach to copy to multiple devices too (cp globe-plug-1.yaml globe-plug-2.yaml and edit the number: "1" line)
From here, you’ll want to go back to ESPHome Builder and edit the file you created, then click Install on the top right of the window (ignore the name in this screenshot, that’s just because I don’t have the exact one to hand), and select Manual Download
The next screen will ask you for a format, I use the UF2 package since that just works. But you can also create a cloudcutter image so you can simplify your steps and pass that directly to cloudcutter when you want to jailbreak your device.
Finally, ESPHome will get compiling! This can take a bit of time if there’s a lot of dependencies to download, but don’t close the window, that can cause other problems
When it’s done, you’ll get the file automatically downloaded (or you can click the Download button if it didn’t do that)
Again, ignore the filename here, that’s just because I took these screenshots for my Globe RGB Bulbs (see below)
Now you can connect to the kickstart-bk7231t access point
If you’ve done everything correctly, you can visit 192.168.4.1 in your browser, scroll to the bottom for the OTA Update
Click Choose file and select the .uf2 file you downloaded from ESPHome
Click Update, you won’t get immediate feedback of something happening (if you look at the tab title you may see a loading icon), but when it’s complete you’ll get a simple page telling you it’s done!
The device should reboot and connect to the WiFi you selected in ESPHome builder.
It didn’t connect!
If you didn’t specify an SSID and password in the ESPHome Config file, the device will reboot into AP mode again with an SSID that matches the device name, you can connect to it directly and specify the WiFi access point to use. Personally, I like to explicitly declare my AP details so I don’t need to think about this step.
Connecting the device to Home Assistant
Home Assistant should now notify you it’s found a new device, just click on the notification -> Check it Out! -> Add -> You shouldn’t need to change anything here.
Congratulations! You’ve succesfully flashed your device and added it to Home Assistant with ESPHome.
Now just go and repeat these steps for the rest of your devices…
Speeding it up
As mentioned, you can speed the flashing process up a bit, from the output you got after selecting your device manually, you can extract the profile and the firmware, these can be providded as command line options for tuya cloudcutter. Oddly the device slug is the -p option for me.
That makes it a bit easier, and as mentioned briefly you can setup all your ESPHome configurations in advance, and download the .u2 file to directly flash your devices immediately with the target firmware to avoid connecting to the hotspot
If you go this route, make sure you put the firmware in the custom-firmwares directory in the checked out tuya-cloudcutter repository, since this is mounted in the docker containers for use, it can’t acces your $HOME directory.
Troubleshooting
I had a couple of unused devices that wouldn’t work out of the box, it ended with The profile you selected did not result in a succesfull exploit
Scanning for open Tuya SmartLife AP
....
Found access point name: "Globe Suite-F01A", trying to connect...
Device 'wlp0s20f3' successfully activated with 'f4ab1af2-5e3d-4ca0-94c2-d7b331bd0ec6'.
.
Found access point name: "Globe Suite-F01A", trying to connect...
Device 'wlp0s20f3' successfully activated with 'f4ab1af2-5e3d-4ca0-94c2-d7b331bd0ec6'.
Connected to access point.
================================================================================
[!] The profile you selected did not result in a successful exploit.
================================================================================
I had two issues here
One device I just selected the wrong profile! D’oh
One device needed to be updated to the right firmware version
Looking at the selected profile output, and comparing the version in it to the Firmware version on the device would show the issue
My light was running on an older firmware, a quick update via the Tuya app fixed this!
Incorrect WiFi setup
If you got your WiFi information mixed up and try to connect to the devices local access point after flashing the ESPHome Firmware, there’s a chance of a recovery issue. A friend of mine encountered this
When he connected with his laptop, he could visit 192.168.4.1 but nothing would show. Viewing the page source he could see the following
The issue is that the JS file is stored online and he only had one Wireless connection (being used by the device) so it couldn’t download the javascript file.
The options are:
Connect a second network connection to the laptop (wireless or wired, just as long it can access the internet)
Use your cellphone to connect to the bulbs Access Point, your mobile data will download the javascript for you